Observatory Build – Part 5

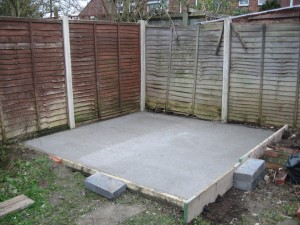
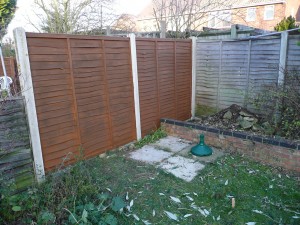
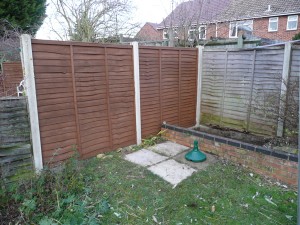
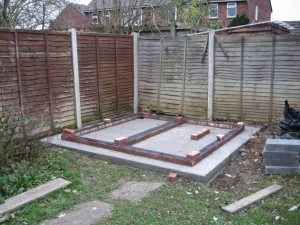
Just a short update to show the brickwork all completed ready for the wooden part of the observatory. The brickwork supports the base of the observatory and keeps it above the concrete base to prevent water seeping underneath and rotting it. The three bricks rear right will support the edge of the hole in the base for the pier. A layer of damp proofing between the bricks and the base should keep it all nice and dry.

The new fence panels have arrived and are ready to slot into the concrete posts to tidy up the rear boundary of the garden.

Brickwork
Brickwork for observatory base

Observatory Build – Part 4

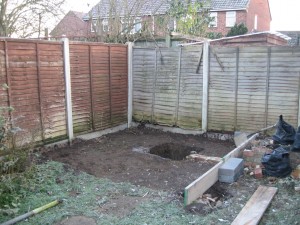
The concrete base for the observatory was laid yesterday. What my builder has done in two days would have taken me a month (or three) of Sundays! Next job is for him to lay a single course of bricks to set the wooden base of the observatory on. This will prevent water seepage under the edges of the base and prevent the base from rotting. That’s being done next week and he’s also replacing the rotten and broken fence panels you can see in the photo. There will be a 300mm gap around the observatory for maintenance access. After that’s all finished I can erect the walls and roof supports and then get the boys around to get the roof on!

Concrete base
Concrete base for observatory

Once the observatory is erected it’ll be time to kit it out. I’m planning to run a caravan power cable from the external socket on the house to a socket on the outside wall of the observatory. This will be a simple job to connect up each time when I want to observe. I have some old kitchen units and surface to use for storage and a work bench.

A new telescope and mount is going to go in there and once that is purchased I’ll need to work out what height steel pier to get/have made. The commercial ones tend to be in the 800-1100mm height range, I have no idea if that will be adequate yet. It needs to be high enough so that I get as low a horizon as possible but it also needs to be low enough so that the telescope can be parked horizontally without the roof hitting it. I won’t know the ideal height until I have the new telescope set up on a tripod for starters.

Observatory Build – Part 3

The foundations for the observatory and pier were dug yesterday by the builder and are being filled with concrete today.

Observatory foundations
Observatory base dug out ready for concrete

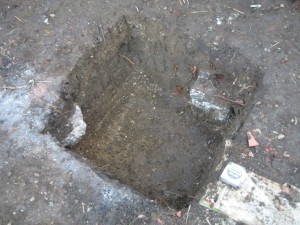
The hole for the pier has been dug down to the very stiff clay/gravel of the Summertown-Radley Sand and Gravel Member drift deposit which underlies the garden (about 500mm deep). Speaking from experience this deposit is extremely difficult to dig by hand!! Once filled with concrete this will be a very firm foundation for the telescope pier which will be bolted to it.

Pier hole
Hole for pier foundations down to the very stiff clay/gravel ballast

Observatory Build – Part 2

It’s been nearly two years since Part 1 and not a lot has happened to my observatory build in that time! But things are moving apace now. I have sourced, bought and collected a 2nd hand Alexander’s Observatories 8’x8′ rolling roof observatory shed which belonged to a member of a local astronomical society who sadly passed away suddenly in the summer. It’s a very sturdy building and very heavy (the roof especially).

I have a local builder coming next week to dig out and lay a 3m x 3m concrete slab for it to live on where I started clearing space in 2011. He will also dig a hole down to the stiff ballast (about 500mm deep) to which I will bolt a steel pier.

Once that is laid I can re-erect the observatory which was originally screwed together (we had to cut some of the screws) but I will bolt together for easier dismantling in the future. I will also insulate the walls to help keep the inside a bit cooler in the summer. After the walls and roof supports are erected I will need to arrange a topping-out ceremony by inviting several friends around to help me lift the roof into place, it took seven of us to lift it off from it’s original location so I’m expecting similar will be required to put it back on again!

After the building is complete I will need to buy a pier and bolt that to the concrete foundations. I’m also planning a new mount and telescope to go on top of that.

It’s all moved very quickly in the past couple of weeks and I hope to have the observatory erected by Christmas if I can. I’ll post some pictures as the work progresses!

Observatory Build – Part 1

I’ve finally got around to starting to build an observatory. After several false starts and several years of saying I must build an observatory I’m finally doing it! Finally got fed up of polar aligning etc. before observing, it will also help enormously with my asteroid accultation observations.

I will be building a roll-off roof observatory based upon a 8’x6′ shed. I’ll be building my own pier roughly based upon one shown in Sky & Night Magazine (http://www.skyatnightmagazine.com/feature/how-guide/how-tobuild-back-garden-telescope-pier).

The observatory will be positioned in the NE corner of my garden which is furthest from the house. This will be give me good views to the SW and W. The E horizon won’t be as good and the SE will be largely hidden, this isn’t a big problem as Didcot Power Station is only a kilometre away in that direction and is a massive light polluter. The plume from the cooling towers often obscures the NE to SE as well.

The pier will be off-centre, 3′ from the W end of the shed, the roof will roll-off to the W so I need to think about how high that will be. Electricity will be supplied from the house using a caravan lead and connectors.

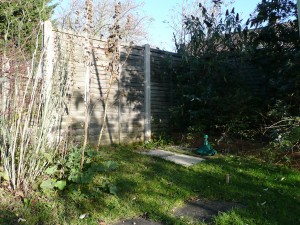
This is the site before I did anything. Unfortunately this corner has become a bit of a dumping ground for previous projects and has got overgrown. The previous owners built this wall across the bottom of the garden and filled in behind with soil.

The peg is roughly where the corner of the observatory will be. The green stand roughly where the pier will be.

The first job was to remove all the vegetation and to treat the fence panels. I installed the fence several years ago and annoyingly the neighbour at the end of the garden has piled up a load of spoil against the rear panel and this will need replacing. This is how the site looked after my first afternoon of preparatory work.

You can see the large pile of soil and rubble that needed shifting! Part of the wall will need to be demolished and my temporary patio slabs lifting (they are just on the soil).

Two more afternoons and 26 rubble sacks filled with spoil and taken to the tip later and the site looks like this.

Still plenty more to shift but the worst is done. I’m going to lay a concrete base for the observatory so I will use some of the bricks from the wall as hardcore. The ground slopes to where I took the photo so there isn’t actually too much to dig out from in front of the wall. I hope to finish the groundworks over the winter and get the shed built in the spring.

I’m going to keep tabs on the total cost. So far…

  • Fence treatment = £10.99
  • Rubble sacks = £5.99
  • Pick axe = £20.98
  • TOTAL = £37.96


Imaging Jupiter – My Methodology

Jupiter will be at opposition (opposite the Sun in our sky) in late October. This is when it is closest to Earth and therefore largest and brightest. It’s around this time it becomes very noticeable as a bright yellowish beacon in the east as it gets dark. You cannot mistake it for any other object as it is far far brighter than any star.
This is also the time when every astrophotographer tries to get good images of Jupiter (and its four Galilean Moons). I’m no exception. I’ve taken a few images of Jupiter before but I don’t really have the right telescope for planetary imaging. Telescopes with long focal lengths (high focal ratios) are usually better and I have a short focal length widefield telescope as my main instrument.

This doesn’t deter me from trying of course and I have a DMK 21AU04.AS camera for just this job. The camera takes monochrome avi videos of whatever it sees and by taking the individual frames from the video and stacking only the very sharpest you can beat the seeing. Seeing is where the object you are watching wobbles about and flicks in and out of focus due to air currents in the atmosphere.

The other evening (24th September) I used the DMK camera, my 200mm F/4 Newtonian telescope, Astronomik RGB filters in a filter wheel and a Televue 5x Powermate to take three videos of Jupiter of 1000 frames each at 30fps. One through a red filter, one through green and one through blue. This gives a decent number of frames to work with in a not too massive file. The Powermate makes Jupiter a decent size on the imaging chip, we want to cover as many pixels as possible to get the maximum amount of detail.

By stacking the best 1/3 of the frames in Registax software I obtained three monochrome images of Jupiter. The clever bit comes when you combine these three images together, making the monochrome image taken through the red filter monochrome red, green as green and blue as blue. When you do this, as if by magic you get a colour image of Jupiter! I used Astra Image 3.0SI software to do the combining.

After creating the RGB image I did a small amount of post-processing in Astra Image 3.0SI. Deconvolution works wonders to bring out the sharpness, followed by a little curves and colour adjustment. This is mostly trial and error and personal preference, it’s easy to overdo post processing and end up with an over sharpened or too saturated image if you’re not careful.

Voila, one pretty decent colour image of Jupiter, showing details in the cloud bands and the Great Red Spot (which is actually a pale pink colour).
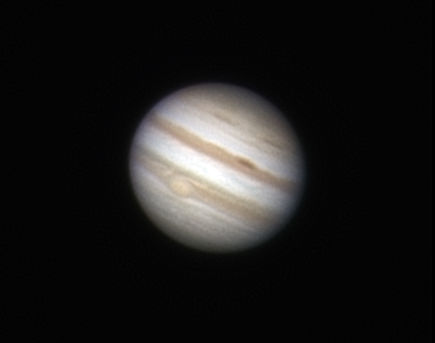
Jupiter

Notice the less abrupt edge to Jupiter on the right-hand side. Before opposition we are able to see slightly around to the night-side of the planet here and the cloudy atmosphere of the planet means there isn’t a sharp edge between night and day like there is on the Moon.

This is probably the best image I’ve taken of Jupiter so far helped by the exceptionally good seeing on this evening. Hopefully we will get more good evenings as opposition approaches and Jupiter gets a little bit bigger. I will be out trying to better this and/or get some satellite events too, e.g. moon shadows and transits.

Thanks to the power of twitter and retweets this image has had over 1500 views on Flickr!
‘Supermoon’

There have been some ridiculous news stories over the so-called ‘Supermoon’ of 19th March 2011. Especially the irresponsible one by the Daily Mail suggesting the Tōhoku earthquake of 11th March was caused by it. The only noticeable difference here on Earth will be larger than average spring tides.

This is the text of a post I made in uk.games.video.misc which sums up the facts…

You wouldn’t really notice the difference between a perigee* and an apogee* Full Moon unless they were side by side in the sky.

The Moon is always its ‘usual’ size. Sometimes a little bigger, sometimes a little smaller. Occasionally perigee coincides closely with Full Moon which is what happened on Saturday.

The difference between the extremes is 14% but usually the Full Moon occurs somewhere between apogee and perigee so each Full Moon is only a small percentage different from the next.

In fact this month’s Full Moon was just 1.08% bigger than February’s. April’s Full Moon will be just 0.10% smaller. Impossible to spot the difference. The news articles fail to mention this though!

The only thing unusual about this month’s Full Moon was how close it was to perigee, this made it the largest Full Moon since 1993, but not really anything so extraordinary. The Moon goes through perigee once a month so it always reaches its maximum apparent size at some point in the month, it just might not be full.

The Moon always appears larger when it’s close to the horizon due to an optical illusion. The Moon Illusion. The eye is fooled into thinking it’s further away and you have familiar objects close by to compare size with (e.g. houses, trees).

* the Moon’s orbit isn’t circular, it’s an ellipse. Once a month it passes through perigee (closest to Earth) and apogee (furthest from Earth).

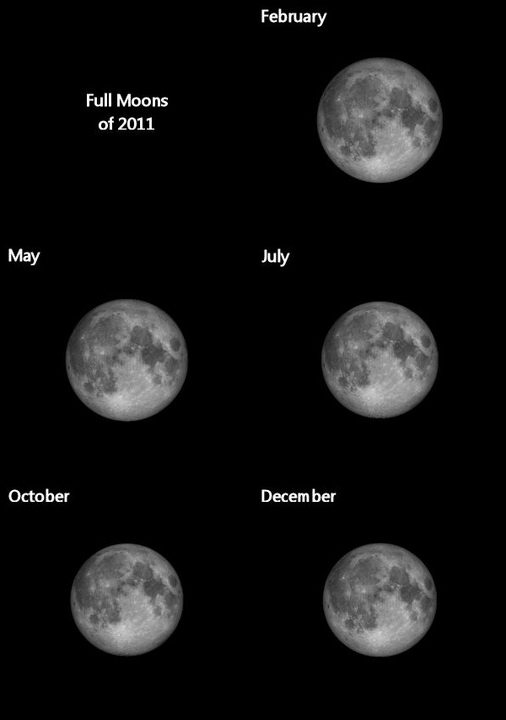
Here is an animation showing the exact point of Full Moon for all of 2011. Notice how the Full Moons of January to April are almost exactly the same size. They then slowly decrease in size over several months. There’s no way anyone will spot the difference from month to month. It also neatly shows the libration effects, where the Moon shows a slightly different face to us as it orbits the Earth. Simulated images are from Virtual Moon Atlas.

Full Moons of 2011

The apparent size of April’s Full Moon is only a tiny fraction smaller than March’s. To all intents and purposes another ‘Supermoon’. Will we see stupid headlines about that one? I doubt it.

New Astrogallery

M33 - Traingulum Galaxy
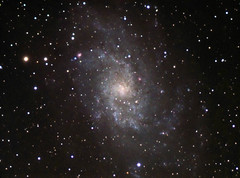
OK, I’m happy to release my new Astro Images gallery now. I’m using Flickr to store images, sharing, comments etc. I’ve written a WordPress plugin which uses the JSON feed from Flickr to display the images here.

I’ve not moved all the images across to Flickr yet but I’m also having a bit of a cull as some of my earlier images, especially of Messier objects, don’t really look that good anymore. I’m planning to take better images of the objects this year. I’ve also reorganised the images into (I think) better categories.

So, over the next few weeks I’ll be putting up old, reprocessed and new images onto Flickr and they will appear in the Astro Images gallery on here.

Of course you can skip all of this and just go straight to my Flickr gallery if you want!

Partial Eclipse

Partial Eclipse - January 2011We had some fun trying to spot the partial eclipse. The forecast was absolutely awful so I didn’t hold out much hope of seeing it, despite this I gathered together all the equipment we were going to need for the morning.

I was somewhat surprised when the alarm woke me to find that the skies were pretty clear, I could see Venus through some thin mist and several stars. Looked good for the eclipse. So I raised the family (some were more reluctant than others) and packed my solar scope, binoculars, camera, tripod etc. into the car.

The plan was to drive to Wittenham Clumps to watch the sunrise. However, about 0.5mile north of home we drove into thick fog. Undeterred we continued in fog right to the car park at the clumps. Hopeless. So we drove all the way home again and back into partly clear skies! We parked and ran up the footpath nearby into the field behind our estate and setup with just a couple of minutes to spare.

The Sun rose, partly obscured by thin cloud but I could get some photos, everyone had a look using the telescope and solar specs. Even a couple of passing dog walkers had a look! Shortly afterwards the Sun moved into thicker cloud and was lost from view.

Very pleased to have seen the eclipse, it was worth the panic! I’ve only missed one of the last six eclipses visible from home now which is a remarkable record for the UK!

Star Camp – Autumn 2010

It was time for the regular Reading AS Star Camp in deepest darkest mid-Wales. We’ve been running these for 3 years now and we’ve had mixed success with the weather. One camp we had snow, one camp we drowned. But a few have been amazingly clear.

We stay on a farm that has B&B and camping. It does breakfasts and evening meals so ideal for not having to be too self-reliant. When it’s clear it is fantastically dark but when it isn’t we have a bit of a social with several bottles of red wine.

This autumn it was the latter! I just went for Saturday night as the forecast was promising and when I arrived mid-afternoon it was pretty clear. But during dinner the heavens opened and it rained on and off until around 11pm. It stayed stubbornly cloudy thereafter.

We retired to our rooms/tents. I happened to awake at 4.15am and stuck my head out of the flap of my tent and it was clear! Orion was right in front of me and of course I was already fully dark adapted. The Milky Way stretched overhead and the Pleiades blazed. I spent about 20mins taking in the sights but 4.15am is not a sensible time to be setting up telescopes and it was cold, the outside of my tent crackled with ice.

The morning was uniform grey so I must have been lucky to see a brief clear spot, the ground was white with frost. Disappointing that I didn’t get any observing/imaging done but still a good sociable occasion.