Observatory Build – Part 7

I think this will be the last post entitled “Observatory Build” as it is now built! I had three friends around at the weekend and we just about managed to get the roof on between us. I borrowed a hefty trolley from work which made getting down the side of the house and to the end of the garden doable. I think it would have been impossible without. The roof went around the corner easily, I had been very worried that it wouldn’t make it.

So here it is with the roof on, guttering fitted etc. The previous owner had a water butt on the other side hence the truncated downpipe. I’m going to deck the area under the runoff in the spring and I will have a water butt too. I will also replace the vertical posts with longer ones and brace them more attractively.

Observatory built
Observatory built

Since the weekend I’ve finished off the walls inside, temporarily set up the cupboards and started wiring up the electrics. I’m going to order the new telescope and mount soon so I can buy the right height pier and get that installed.

Observatory Build – Part 6

Big day today as Matthew and I spent all day erecting the observatory ready for the roof to be lifted on. First job was fitting the new fence panels, they’re not especially heavy but cumbersome to handle so it took three of us to slot them in. It was then all hands to the pump to manoeuvre the base into position.

Observatory base
Base in position

The base is very heavy so it was more of a drag than a lift and a gentle drop (after a less gentle drop!) into position. I decided to line the walls with insulation, I was in two minds whether to do this or not but in the end thought I might as well. This took a couple of hours of cutting and banging to get into place before we could screw the first two walls together.

Insulating walls
Matthew playing Tetris with the insulation

We made a slight faux pas putting the last wall into place as we managed to lock ourselves into the building! We had to remove the wall to retrieve the keys! Doh! We put the beams into position for the track which carries the roof. A temporary fix for the verticals on a pile of blocks, I will build proper plinths for these in due course.

Observatory sans roof
Ready for the roof

The last job was to cover everything with a tarpaulin until next week when I hope to have several helpers available to get the roof on. I’m slightly nervous about getting it around the corner down the side of the house. It would be ideal to get it on in one piece. Breaking it into two pieces would be difficult and it might never be the same again. It’s starting to take shape now!

Observatory Build – Part 5

Just a short update to show the brickwork all completed ready for the wooden part of the observatory. The brickwork supports the base of the observatory and keeps it above the concrete base to prevent water seeping underneath and rotting it. The three bricks rear right will support the edge of the hole in the base for the pier. A layer of damp proofing between the bricks and the base should keep it all nice and dry.

The new fence panels have arrived and are ready to slot into the concrete posts to tidy up the rear boundary of the garden.

Brickwork
Brickwork for observatory base

Observatory Build – Part 4

The concrete base for the observatory was laid yesterday. What my builder has done in two days would have taken me a month (or three) of Sundays! Next job is for him to lay a single course of bricks to set the wooden base of the observatory on. This will prevent water seepage under the edges of the base and prevent the base from rotting. That’s being done next week and he’s also replacing the rotten and broken fence panels you can see in the photo. There will be a 300mm gap around the observatory for maintenance access. After that’s all finished I can erect the walls and roof supports and then get the boys around to get the roof on!

Concrete base
Concrete base for observatory

Once the observatory is erected it’ll be time to kit it out. I’m planning to run a caravan power cable from the external socket on the house to a socket on the outside wall of the observatory. This will be a simple job to connect up each time when I want to observe. I have some old kitchen units and surface to use for storage and a work bench.

A new telescope and mount is going to go in there and once that is purchased I’ll need to work out what height steel pier to get/have made. The commercial ones tend to be in the 800-1100mm height range, I have no idea if that will be adequate yet. It needs to be high enough so that I get as low a horizon as possible but it also needs to be low enough so that the telescope can be parked horizontally without the roof hitting it. I won’t know the ideal height until I have the new telescope set up on a tripod for starters.

Observatory Build – Part 3

The foundations for the observatory and pier were dug yesterday by the builder and are being filled with concrete today.

Observatory foundations
Observatory base dug out ready for concrete

The hole for the pier has been dug down to the very stiff clay/gravel of the Summertown-Radley Sand and Gravel Member drift deposit which underlies the garden (about 500mm deep). Speaking from experience this deposit is extremely difficult to dig by hand!! Once filled with concrete this will be a very firm foundation for the telescope pier which will be bolted to it.

Pier hole
Hole for pier foundations down to the very stiff clay/gravel ballast

Observatory Build – Part 2

It’s been nearly two years since Part 1 and not a lot has happened to my observatory build in that time! But things are moving apace now. I have sourced, bought and collected a 2nd hand Alexander’s Observatories 8’x8′ rolling roof observatory shed which belonged to a member of a local astronomical society who sadly passed away suddenly in the summer. It’s a very sturdy building and very heavy (the roof especially).

I have a local builder coming next week to dig out and lay a 3m x 3m concrete slab for it to live on where I started clearing space in 2011. He will also dig a hole down to the stiff ballast (about 500mm deep) to which I will bolt a steel pier.

Once that is laid I can re-erect the observatory which was originally screwed together (we had to cut some of the screws) but I will bolt together for easier dismantling in the future. I will also insulate the walls to help keep the inside a bit cooler in the summer. After the walls and roof supports are erected I will need to arrange a topping-out ceremony by inviting several friends around to help me lift the roof into place, it took seven of us to lift it off from it’s original location so I’m expecting similar will be required to put it back on again!

After the building is complete I will need to buy a pier and bolt that to the concrete foundations. I’m also planning a new mount and telescope to go on top of that.

It’s all moved very quickly in the past couple of weeks and I hope to have the observatory erected by Christmas if I can. I’ll post some pictures as the work progresses!

Observatory Build – Part 1

I’ve finally got around to starting to build an observatory. After several false starts and several years of saying I must build an observatory I’m finally doing it! Finally got fed up of polar aligning etc. before observing, it will also help enormously with my asteroid accultation observations.

I will be building a roll-off roof observatory based upon a 8’x6′ shed. I’ll be building my own pier roughly based upon one shown in Sky & Night Magazine (http://www.skyatnightmagazine.com/feature/how-guide/how-tobuild-back-garden-telescope-pier).

The observatory will be positioned in the NE corner of my garden which is furthest from the house. This will be give me good views to the SW and W. The E horizon won’t be as good and the SE will be largely hidden, this isn’t a big problem as Didcot Power Station is only a kilometre away in that direction and is a massive light polluter. The plume from the cooling towers often obscures the NE to SE as well.

The pier will be off-centre, 3′ from the W end of the shed, the roof will roll-off to the W so I need to think about how high that will be. Electricity will be supplied from the house using a caravan lead and connectors.

This is the site before I did anything. Unfortunately this corner has become a bit of a dumping ground for previous projects and has got overgrown. The previous owners built this wall across the bottom of the garden and filled in behind with soil.

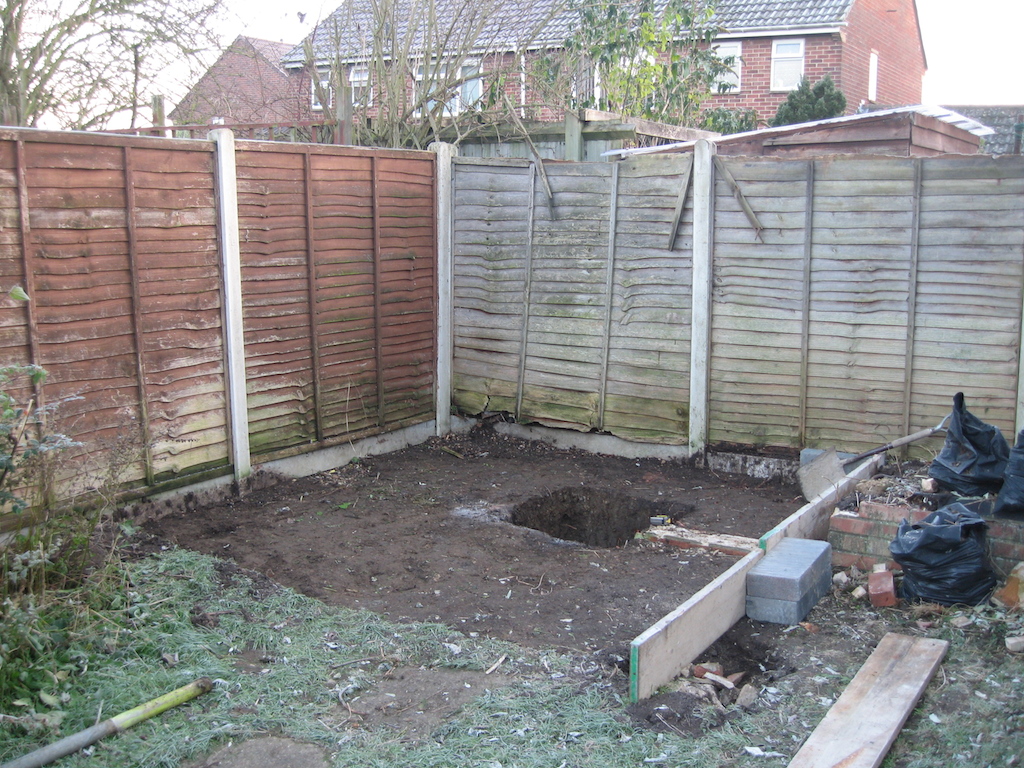
The peg is roughly where the corner of the observatory will be. The green stand roughly where the pier will be.

The first job was to remove all the vegetation and to treat the fence panels. I installed the fence several years ago and annoyingly the neighbour at the end of the garden has piled up a load of spoil against the rear panel and this will need replacing. This is how the site looked after my first afternoon of preparatory work.

You can see the large pile of soil and rubble that needed shifting! Part of the wall will need to be demolished and my temporary patio slabs lifting (they are just on the soil).

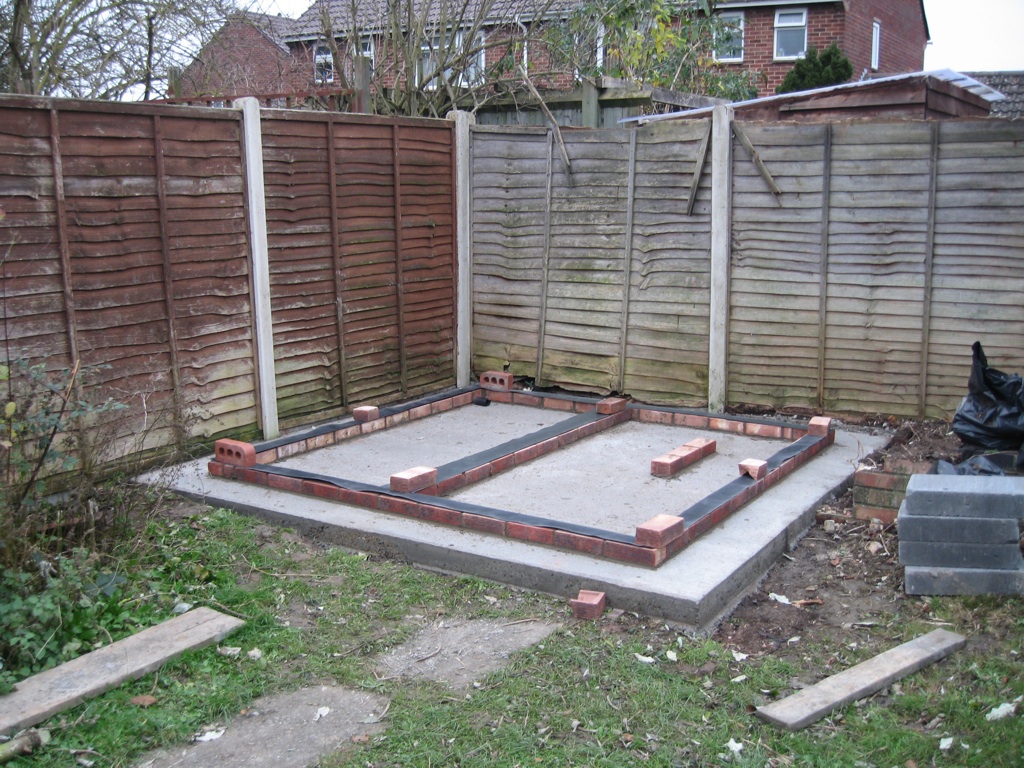
Two more afternoons and 26 rubble sacks filled with spoil and taken to the tip later and the site looks like this.

Still plenty more to shift but the worst is done. I’m going to lay a concrete base for the observatory so I will use some of the bricks from the wall as hardcore. The ground slopes to where I took the photo so there isn’t actually too much to dig out from in front of the wall. I hope to finish the groundworks over the winter and get the shed built in the spring.

I’m going to keep tabs on the total cost. So far…

  • Fence treatment = £10.99
  • Rubble sacks = £5.99
  • Pick axe = £20.98
  • TOTAL = £37.96