You’ve probably seen me wittering on about asteroid occultations at some point or other, or you’ve seen the links to my results page on the left. Maybe you’ve even read my Asteroid Occultation 101 page and still have no idea how it’s done or why.
It’s rather complicated but the idea of this post is to try and explain how I observe asteroid occultations.
Let’s have a look at a schematic of my setup. Click to see the full size version.
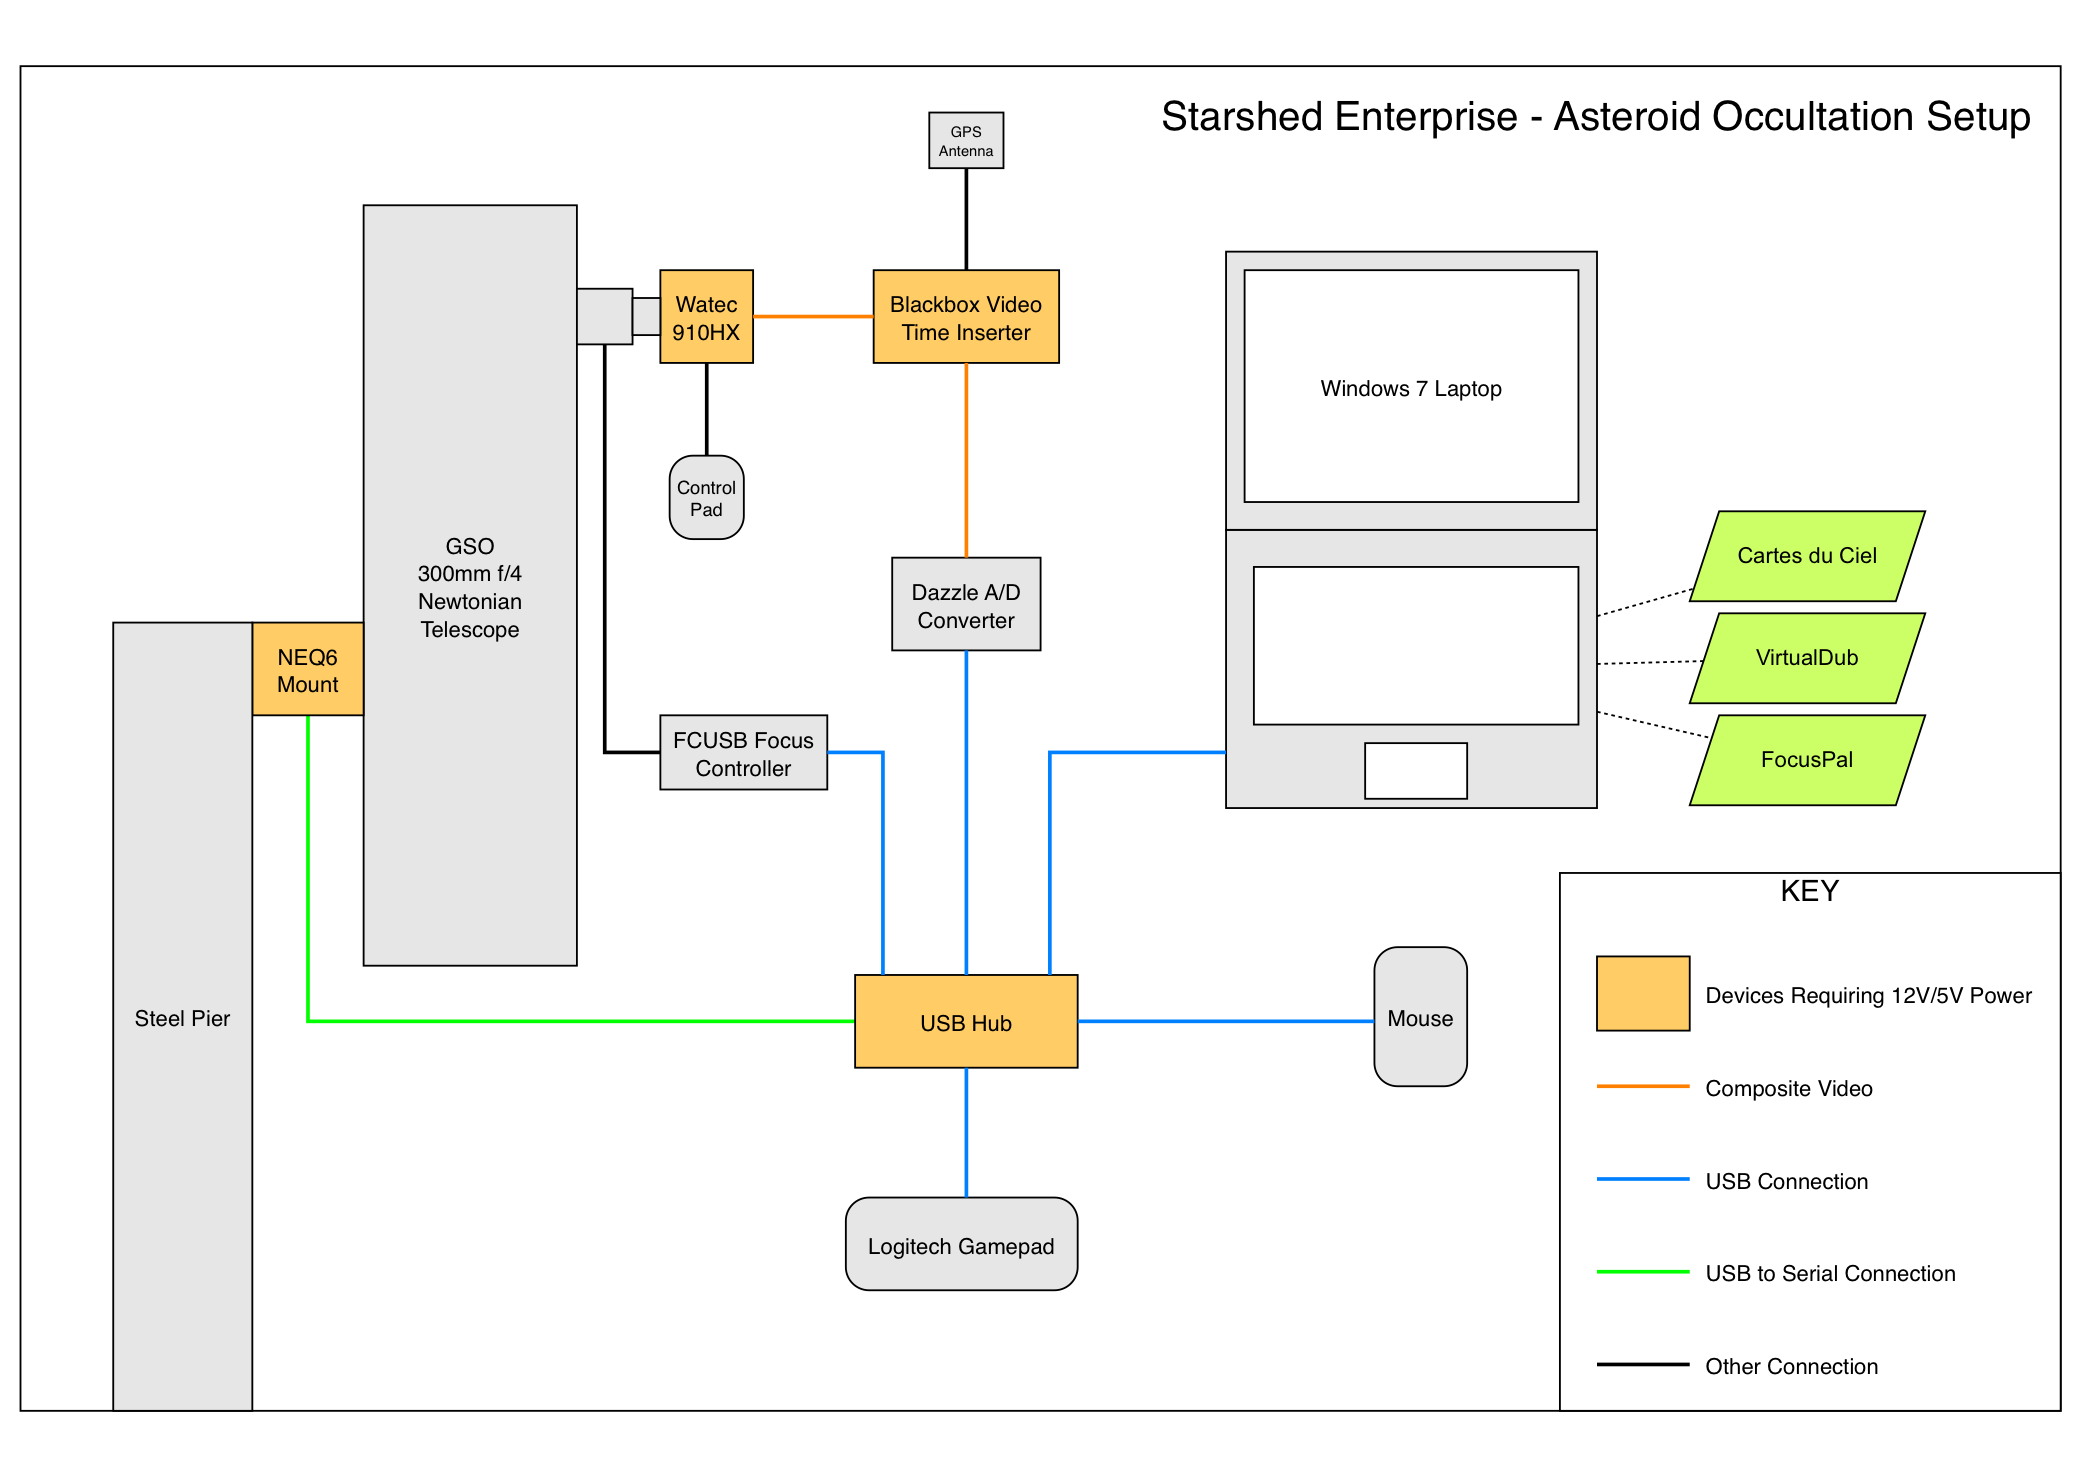
I told you it was complicated! Basically what we have here is a computer controlled telescope. The laptop controls the pointing of the telescope mount via software (Cartes du Ciel). This allows me to find and point the telescope at the star I want to observe. The gamepad is used as a remote control for fine movements to align and centre the star in the field of view.
Another piece of software (FocusPal) controls a motorised focuser on the telescope so I can keep the star in focus without having to touch the telescope which would cause it to move and vibrate.
The third bit of the jigsaw concerns the video recording aspect. A very sensitive video camera (Watec 910HX) records what it sees through the telescope, it’s sitting where I would put an eyepiece if I was observing visually. The camera is clever in that it can do internal frame integrations. It can take exposures of up to five seconds allowing fainter stars to be observed. Typically exposures of 0.16s or 0.08s are used.
The video signal passes through a Video Time Inserter (VTI) which adds a GPS accurate time stamp onto the signal. I want to record the video on the laptop so the analogue video signal passes via an Analogue to Digital (A/D) converter to the laptop. VirtualDub software is used to record the digital video signal and because the raw video would result in huge files a non-lossy compression codec is used to reduce the file size somewhat (Huffyuv codec).
Once this is all setup and working and I’ve found the star I want to observe I get a 728×576 25fps video recording of the event. I usually take a four minute recording centred on the predicted time. This allows for time errors and/or the possible discovery of asteroid satellites.
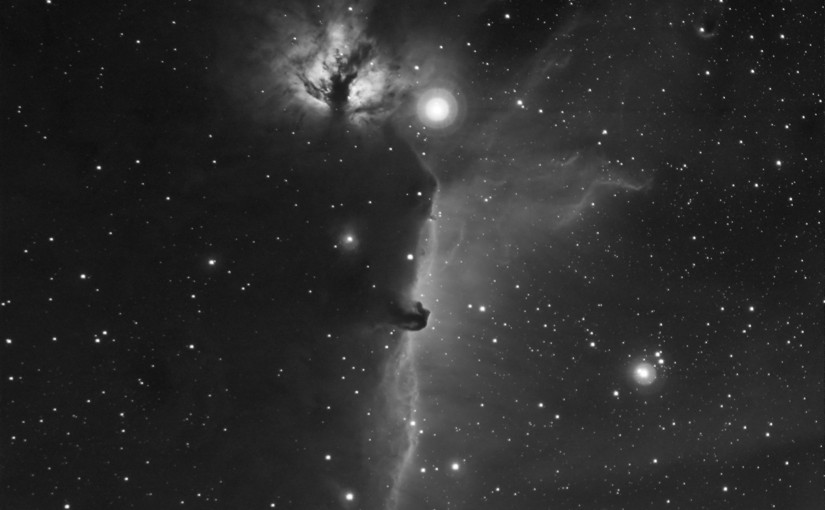
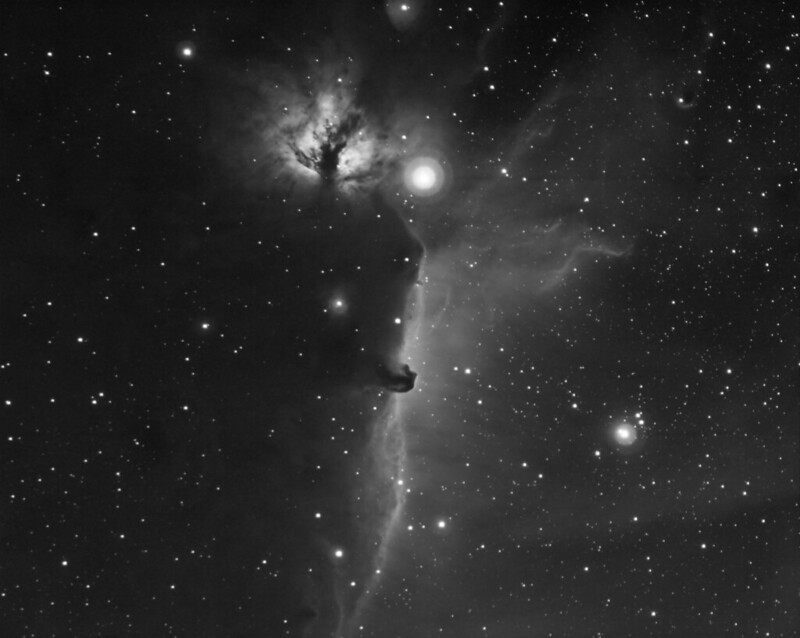
A still image from a typical recording looks like this.
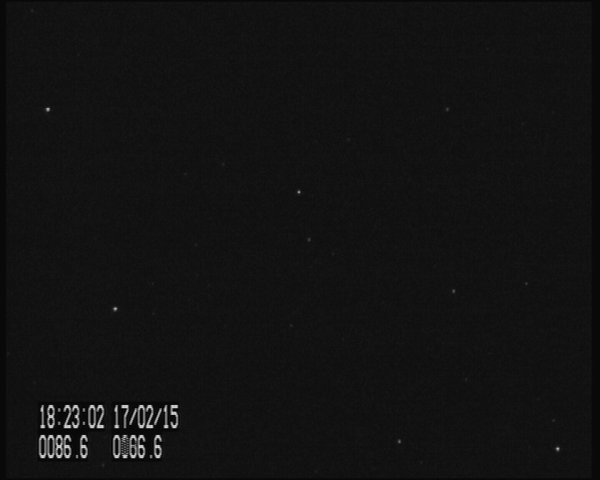
I usually put the target star right in the centre of the frame, as I have done above. It needs to be visible but not saturated. Using the camera controls I can adjust the exposure, gain and gamma settings to get a good signal to noise ratio. The timestamp from the VTI can be seen lower left. The time this frame was recorded was 18:23:02.0866 on the 17th February 2015. Accurate timing is essential for asteroid occultation observations. It can be done with radio signals or even a synced PC clock but a 1 pulse per second VTI makes it a whole lot easier.
A few years ago if the observation was positive (the asteroid passes in front of the star) I would have to bother myself with complicated calculations of internal camera delays (see video exposure time analysis). Thankfully it’s a lot easier now with software which automates a lot of the processes.
Firstly I run the video through Tangra 3. This piece of software measures the light output of the target and comparison stars. If the result is negative the light output of the target star (flux) will essentially be a flat line (with random noise) and that’s the end of the processing. The result is reported to the PlanOccult mailing list as negative.
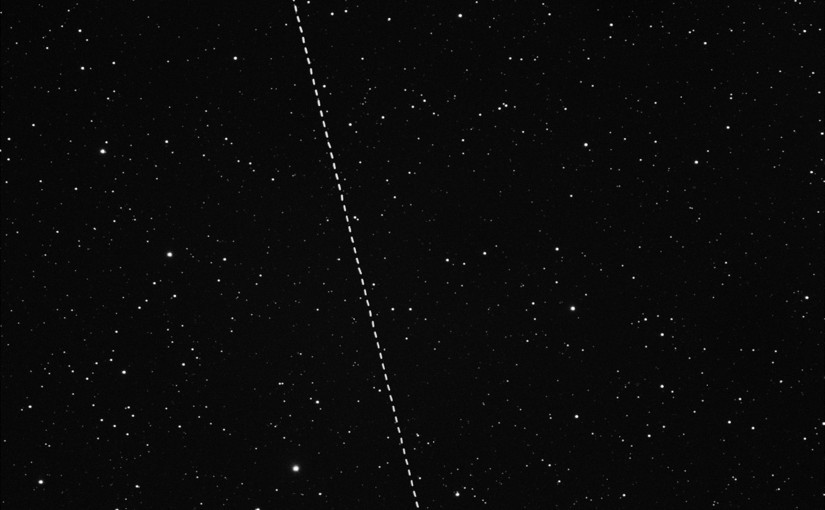
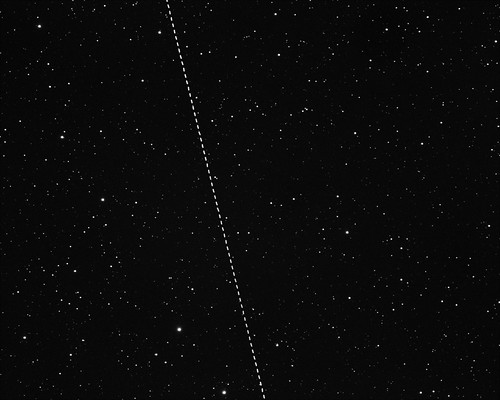
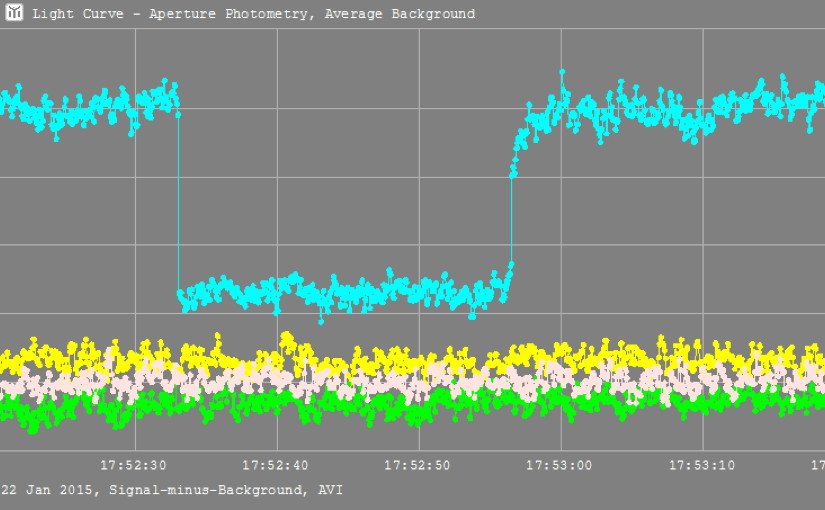
If the result is positive the light output of the star will drop to zero or to that of the asteroid alone. A light curve of a positive result is shown here.
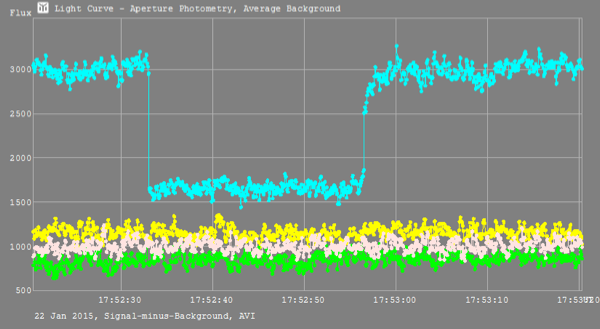
The cyan line shows the light output of the target star. As the asteroid moved in front of the star the light output dropped to that of the asteroid alone. The yellow, green and pink light curves are for nearby comparison stars which are also visible in the video recording.
As this is a positive result I needed to take the data from Tangra 3 (basically a text file of light output values) and import it into the Asteroidal Occultation Time Analyser (AOTA) module of Occult 4 software. After setting some parameters this very clever piece of code automatically looks for occultations in the data, finds them and works out the time of disappearance and reappearance of the target star. It can then correct the times taking into account the internal time delays of the video camera.
The output from AOTA looks like this.
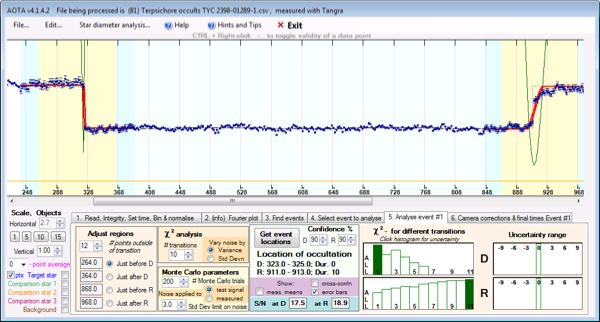
Hey presto, the times are calculated and all that’s left to do is fill in a report form with the observation details and result and send it off to the PlanOccult mailing list. A few days later the result will appear on the European Asteroidal Occultation Results page (euraster.net). Every so often the results are compiled and appear in a peer reviewed journal with my name in the contributers list for use by professionals and future observers.
Easy innit!
Well it is easy once you’ve got the hardware and workflow sorted. It typically takes me less than 20 minutes from the predicted time of occultation to be up and and running and ready to record. Having a permanent setup helps enormously. It means I have been observing many more low probability events that I wouldn’t have bothered setting up for before. I’m still waiting for my first <10% probability positive result though! In fact positive results are rare, about 1 in 20 of my observations have been positive. But the next one could herald a major discovery. The first set of rings around an asteroid were discovered in 2013 using pretty much exactly the same methodology as described above. Maybe I’ll discover the second…