Star Camp – Autumn 2010

It was time for the regular Reading AS Star Camp in deepest darkest mid-Wales. We’ve been running these for 3 years now and we’ve had mixed success with the weather. One camp we had snow, one camp we drowned. But a few have been amazingly clear.

We stay on a farm that has B&B and camping. It does breakfasts and evening meals so ideal for not having to be too self-reliant. When it’s clear it is fantastically dark but when it isn’t we have a bit of a social with several bottles of red wine.

This autumn it was the latter! I just went for Saturday night as the forecast was promising and when I arrived mid-afternoon it was pretty clear. But during dinner the heavens opened and it rained on and off until around 11pm. It stayed stubbornly cloudy thereafter.

We retired to our rooms/tents. I happened to awake at 4.15am and stuck my head out of the flap of my tent and it was clear! Orion was right in front of me and of course I was already fully dark adapted. The Milky Way stretched overhead and the Pleiades blazed. I spent about 20mins taking in the sights but 4.15am is not a sensible time to be setting up telescopes and it was cold, the outside of my tent crackled with ice.

The morning was uniform grey so I must have been lucky to see a brief clear spot, the ground was white with frost. Disappointing that I didn’t get any observing/imaging done but still a good sociable occasion.
H-alpha

My latest astroimaging acquisition is a Hydrogen alpha filter. This filter has a very narrow bandpass and only allows light within 13nm of a wavelength of 656nm to pass through it (normal human vision at night is between 400 and 600nm). Some types of nebulae (emission nebulae, planetary nebulae and supernovae remnants) glow particularly strongly at a wavelength of 656nm due to the excitation state of the hydrogen gas in the nebula.

The advantage of using the filter is that it cuts out all light pollution and all ‘visible’ light and only allows the nebula and stars to show. The CCD chips in the cameras are sensitive to this light so you can achieve very high contrast images of nebula, impossible to achieve with filters that allow visible light through. The images are inky black where there is no nebula so even the faintest wisps can show.

Over the coming weeks and months expect to see images taken using this filter appear in the astroimages gallery.

LRGB

I’ve invested in some colour filters and a filter wheel for my astroimaging setup so I’m going to be posting some colour astroimages up over the coming months, I’ve already posted my first LRGB image of M27 into the gallery.

I thought I’d take a few words to explain how this works. The CCD camera I have is monochrome, these are generally better then singleshot colour cameras as they have a higher resolution and there are no filters in front of the chip. So to get monochrome images it’s just a case of capturing multiple exposures and stacking them in software to increase the signal to noise ratio. To get colour you need to take monochrome images through red, green and blue filters. The filters are very precisely made so they only pass through the correct wavelengths, they also block any infrared light which the cameras are sensitive to and can cause problems. They are also manufactured to ensure that they focus the light from the telescope to the same place, so you don’t have to refocus when you change filters.

The filters are held in a filterwheel, this is a mechanical device driven by batteries that rotates the filters into the lightpath at the push of a button. So there’s no requirement to dismantle the setup to put in the next filter.

So what is LRGB? An LRGB image is made up of Luminance data (monochrome), Red, Green and Blue data. What you do is capture a lot of high quality monochrome data. This provides all of the detail in the final image. You then capture some data through each of the coloured filters, this data can be with much shorter exposures and far lower quality. This colour data can then even be binned, i.e. each square of 4 pixels is summed together to make 1 pixel.  You can also blur it with a Gaussian blur filter to reduce colour noise in the final image. Software is used to combine the three images taken through the coloured filters into what looks like a blurred, low resolution colour image of the object.

Now comes the clever bit, the human eye is really good at picking out detail in monochrome images, it’s rubbish with colour. So what you do is layer the colour behind the monochrome (luminance) data. Lo and behold you have a high resolution colour image!

New Astrocam

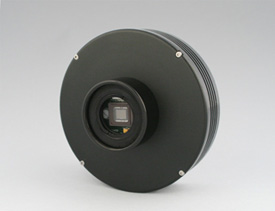
I splashed out on a new CCD camera for astronomy this week. An Atik 16IC-S which is a 16-bit monochrome camera with peltier cooling, resolution is 782×582 pixels. The chip is progressive scan as well. This is a big improvement over the Watec I have been using, which is great for live views of objects but its 10s maximum exposure and noisy output is restrictive for deep sky imaging. The Atik can do unlimited exposures but since my telescope is not autoguiding (yet) I’m limited to about 30-60s which is about as good as my mount can do. You can see my first efforts from last night in my photo gallery. I’m thinking of splitting off the astronomy images into their own gallery by the way.

Where’s Mercury?

This morning was the conjunction of Moon, Mercury and Venus. Due to various astronomical variables which I won’t bore you with, the southern UK was not the best place to see this. However, I got up at 5.30am and drove up to Wittenham Clumps (a nearby Iron age hillfort and just about the highest point within easy reach). The sky was just starting to lighten as I walked up from the deserted car-park. There was frost on the ground and the car temperature was reading -3.5ºC. It was perfectly clear right down to the horizon.

Then I spotted the slender Moon rising, an awesome sight and started snapping off some pictures. Soon afterwards I could just glimpse Venus, easy in binoculars, but couldn’t see Mercury. I continued taking photographs at various exposures hoping that one would capture the inner planet. As the sky began to brighten I knew my chances of spotting Mercury were dwindling, especially as it was 40x fainter than Venus and I could only barely see that. I never did spot it in the binoculars. The sky was by now too bright to even spot the Moon, so I waited for sunrise about 15mins away. It was cold, very cold. And then rapidly the Sun burst above the horizon and on my hilltop perch I was the first to be basked in sunshine as the valley about lay frozen white and in shadow. A glorious experience even if I didn’t quite manage what I set out to do.

Mercury is marginally visible on one or two of my photos, I’m going to have a go at stacking them to try and bring it out. I will post any successful results here